Sunday, March 30, 2014

Enjoying the Drive part 9.

It's time for another installment of Enjoying the drive. I took this picture as I was driving. This truck was in excellent shape. It looked like they were out driving it to haul something. The paint was immaculate! This is one of my favorite body styles of Chevy trucks. I might be biased because growing up my Dad had a 72 Chevy. I didn't appreciate it back then like I do now.
 I ran by this one in a parking lot and took a trip around the lot to go back and snap a photo. It's a little rough but would be fun to drive.
 I'm not sure how much this dude is enjoying the drive but I was amazed at his engineering ability to keep all this junk in the back of that truck. It was actually a hazard. That's why I am driving to the far left of him. The good thing was that he was only 1 mile from the dump exit so the drivers behind him would be safe.
The next 2 pictures came from My friend Ron. He sends me pictures when He comes across cool old cars. This old MG looks like a ton of fun to drive. If I ever came across a good deal on one, I would buy it in a heartbeat.
 I have never owned a British car before but I have always liked them.
The next pictures came from my friend Vance. This Studebaker is very cool. It's in really great shape for the age. I estimate it's probably a 49 to 52ish? I love the visor on it.
 I have always loved the back ends on Studebaker's. I think they are cool looking.
Well, that's it for now. I have once again missed a bunch of cool cars during my drives because of my slow reactions but I will keep trying to get them in pictures. They should be coming out of storage now that the weather is turning nice.

Tuesday, March 25, 2014

Breaking in the Bug!

To break Ed's new engine in, I drove him to St. George and back for the annual Mini Indy trip for my work. This year a buddy of mine that's a pilot for Skywest went with me to help out on the tech team. Here is the beginning of the road trip. There is something cool about driving a 45 year old car across the state of Utah!
 Vance lives in Stansbury Park so I picked him up and we drove the back roads on the west side of I-15 to get to St. George. We took a detour and hit Eureka to see Porter Rockwell's cabin that was moved there from his property. Here it is. It was cool to see and it is amazing how they were built back then. Eureka is a cool old mining town. I had never been there so I enjoyed checking it out.
 While we were looking at the cabin, a guy across the street kept looking at us. He yelled at us and asked if we wanted to see the inside of the cabin. We of course said yes and so He said he had to get the keys and to look at the car he had inside this old building while he went to get them.
This is what we saw inside the building. It's a 1928 Studebaker. It was in great shape for it's age and he told us all about the car and the town. He actually owned a bunch of buildings along main street. He had mentioned that he owned the topless bar down the road and we both rolled our eyes. The funny thing was that as we drove out of town we saw his topless bar. It was an actual bar that had no roof on it. Ha Ha, it was then that we laughed like crazy.
 This was a huge pulley that was once used to lift miners in and out of the mines. I can't remember the name of it but it was huge and very cool.
 We stopped at Delta and hit this Mexican restaurant. I had cheese enchiladas and they were great. I always hit this restaurant on my way to St. George.
We made it to St. George and had fun fixing go karts for a few days. While we were down there we had some time to hit a ghost town that was just outside of Leed's Utah. It is called Silver Reef and was an old silver mine back in the day.
Here is some of the old buildings. These ones were rebuilt.
 The views were spectacular. The weather was just as good down there also.
 More photos from Silver Reef.
Here are some of the old remnants from the silver mine.
 Up on the side of the hill is the remains of a foundation from the mill.
 More old remains from the buildings.
If you look closely at the hill in the background you can see part of an old uranium mine. We drove Ed up that hill and almost got stuck. It was a dirt road and at one point I thought we would need to lift the front of the car to get it unstuck. I guess a lowered bug isn't the best car to go 4 wheeling in.
 You can see the dirt line on the bottom of the front fender in this picture. Ha Ha, we didn't get stuck though.
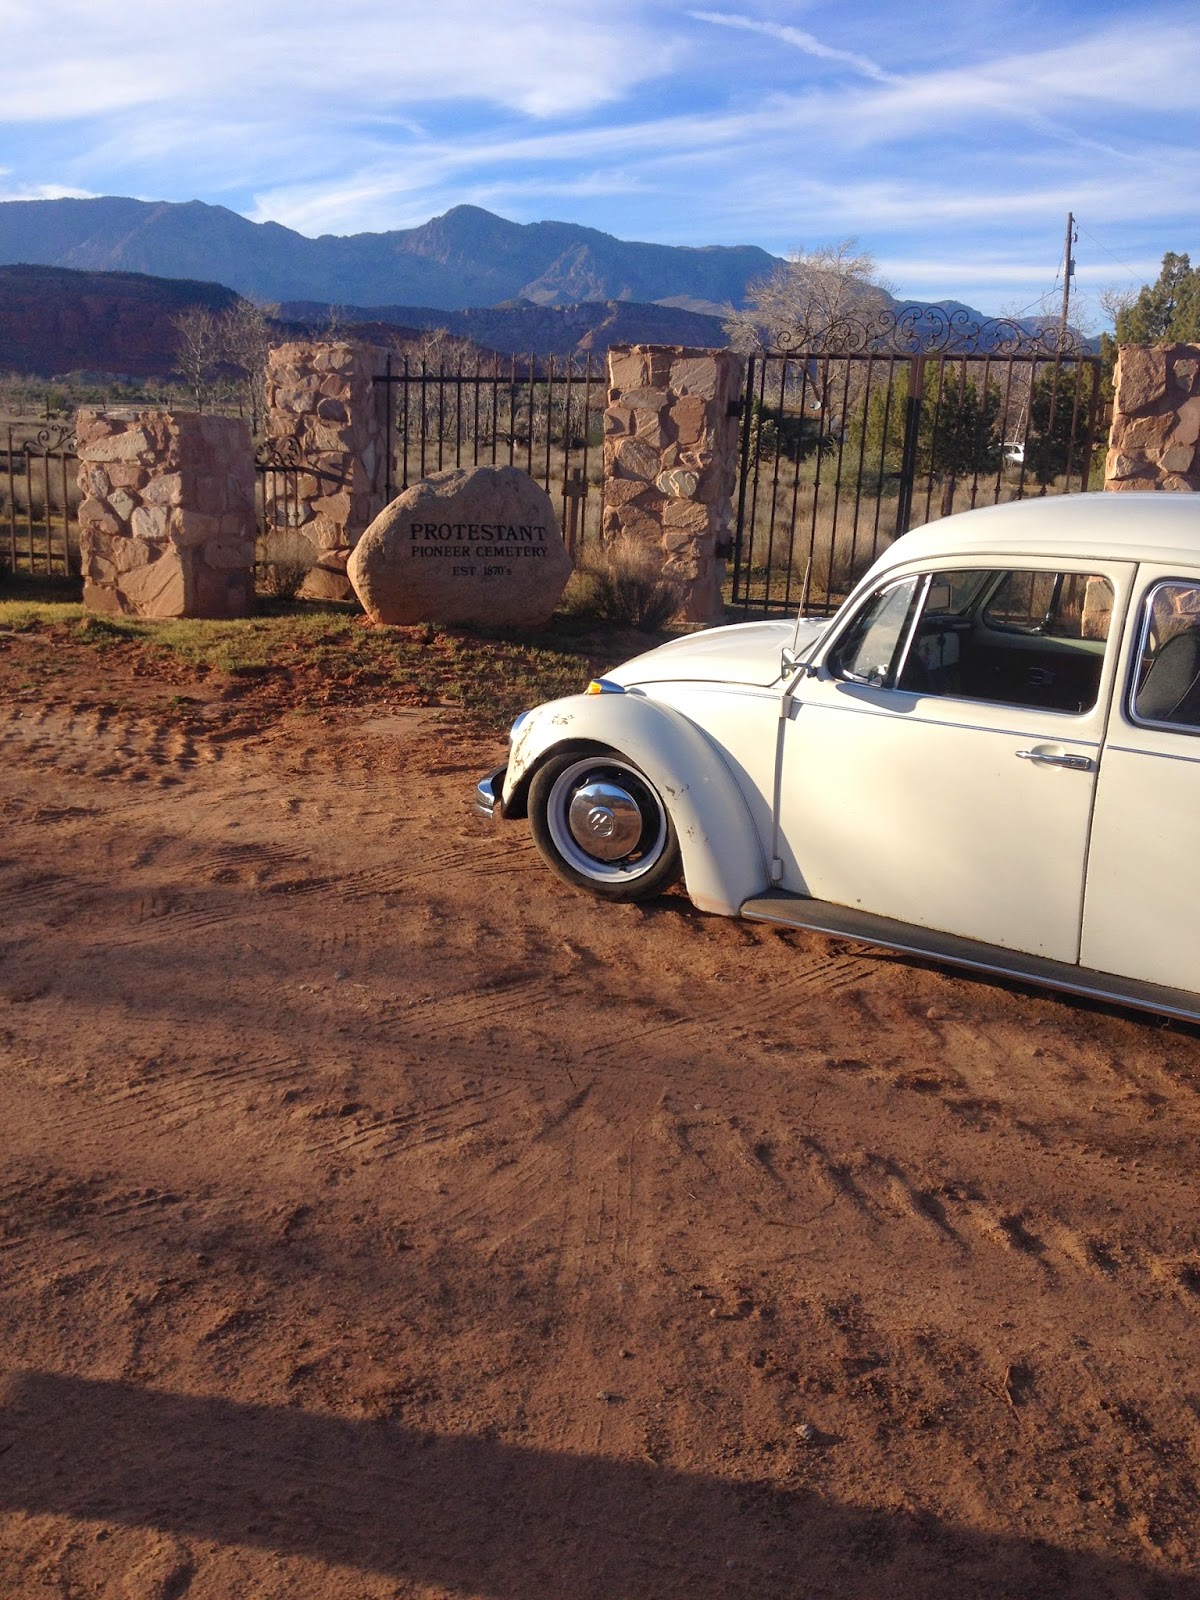
 We came across an old protestant cemetery. There were some old headstones dating back to the early 1800's.
 Looking back at Ed from the cemetery.
 Found some old cool buildings in Leeds also.
We headed home on Saturday. We decided to take highway 89. That is a lot more scenic then the route we took down. We crossed over to it at Cedar City on route 14. I have tried to take this road the last couple years but it has always been closed. It was finally open this year so that's the way we went. It is quite a climb at some spots and we saw a lot of snow along the way but Ed drove great. Here is a wall of ice we saw along the way.
 Climbing higher!
 This is the summit and the view was awesome!
 You can see for miles.
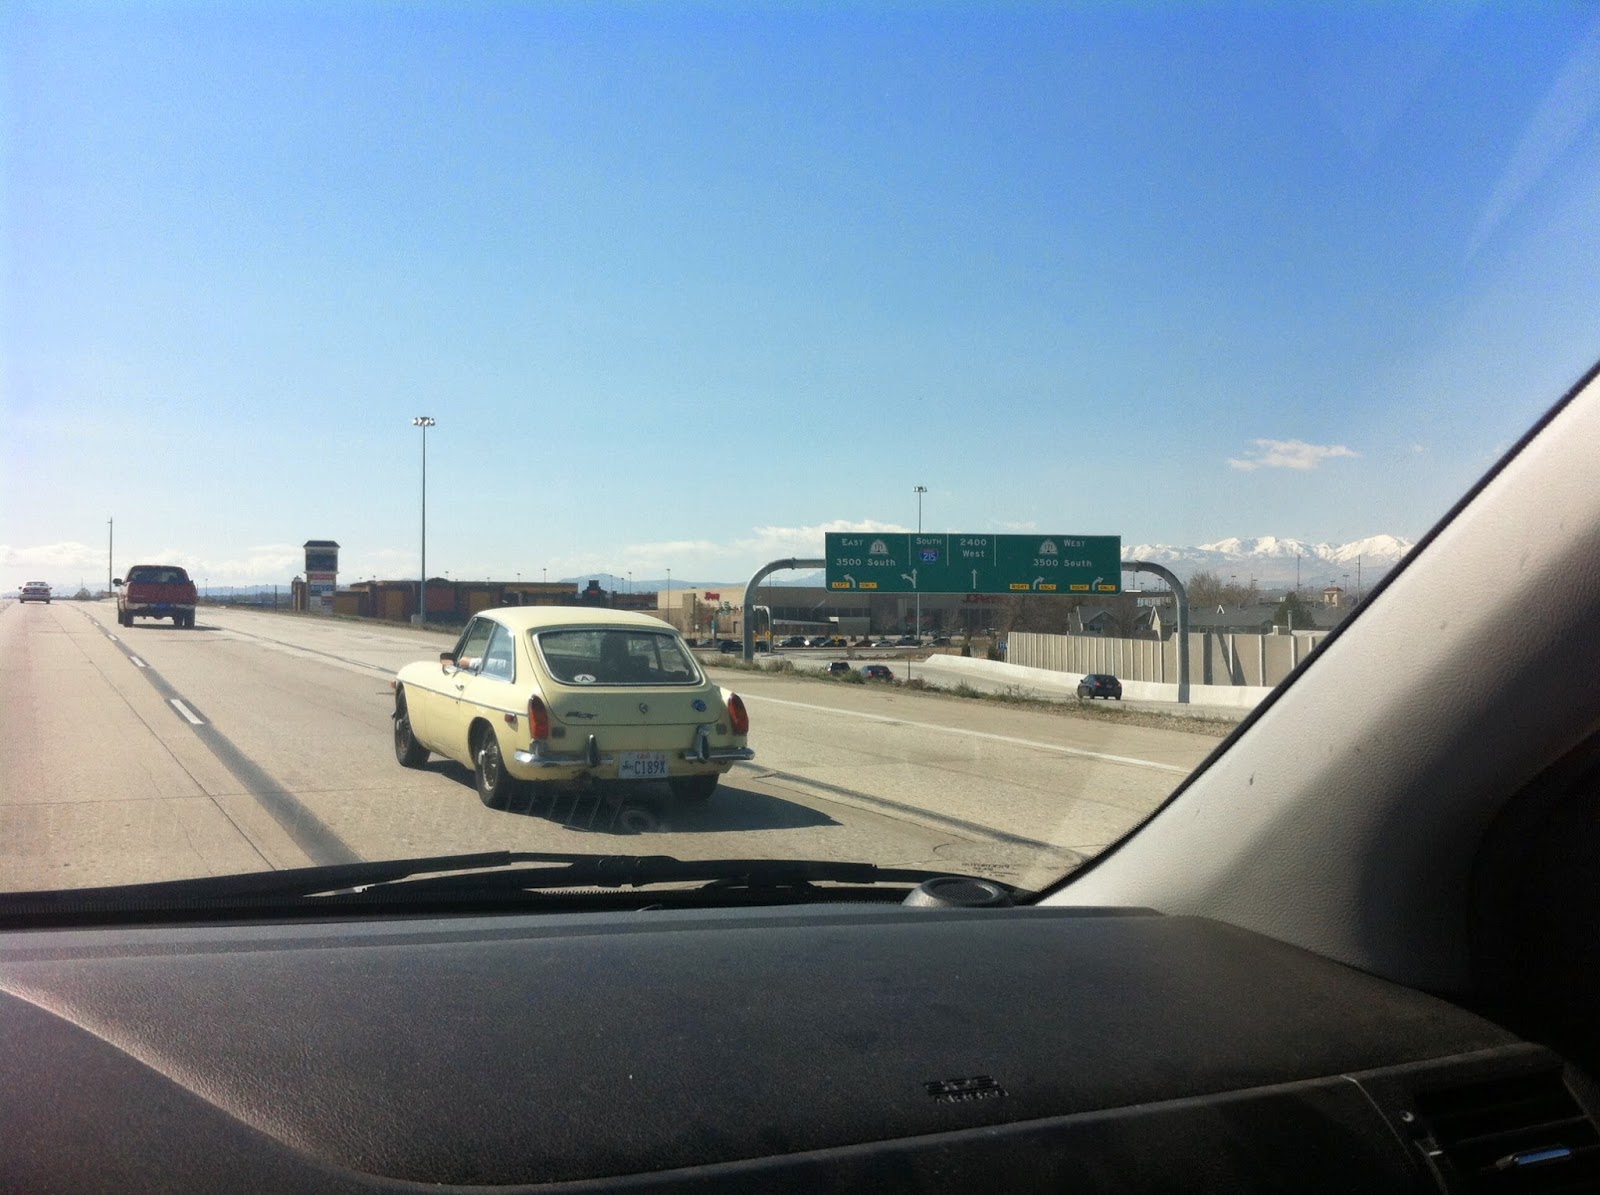
I saw this cool RV on the road home. I had to stop and get a picture. I think if I had it I would get rid of the RV part and make it a car hauler. I love the old Cab Over trucks.
 I didn't have a picture of Ed in Panguitch so I stopped for a one.
 We had all sorts of weather. It was windy, sunny, and we saw rain turn to sleet at one point along the drive.
All in all, it was a great trip. Ed ran like a top without so much as a hiccup. That made all the work beforehand worth it. When all was said and done, we traveled 716 miles, burned 22 gallons of gas, a 1/2 a quart of oil (which was at the beginning of the trip,after the rings seated it didn't lose any) and we averaged 32.4 miles to the gallon. It looks like we can look forward to driving many more miles this summer and enjoying every minute of it!

Friday, March 14, 2014

The sun is shining once again!

March started out really crappy but the month has taken a turn for the better. Ed is running good. I had to go out of town on monday and tuesday so I didn't get a chance to work on it. Wednesday I finished up the engine, adjusted the brakes and took him off the jack stands. Thursday I did a quick tune up on it. I then took it for a spin and did the necessary runs to break in the rings. It runs a lot stronger then it did before the teardown which is good and it sounds pretty good. I finished with some time to spare! Here was the to do list.
I never did take the transmission out and fix the leak. I just ran out of time and the leak is not a horrible one so it will have to wait. I have tomorrow to work on it so I can wash and wax it then. I also have to check the adjustments on the valves once more and change the oil to get all the assembly lube out of it and it will be good to go. It's nice to have him back on the ground again.
 It doesn't look any different except that it isn't covered in oil from the leaks. It sure runs better though. I guess all the lost compression equaled a loss of horsepower. It runs strong now. I drove it to work today and smiled the whole way. I don't know why but this bug is really a blast to drive. I have another bug I drive also but this one is hands down the funnest one to drive.
So it looks like I am going to drive it down to St. George and really break it in. Hopefully break isn't too literal. Check back and see if this old jalopy makes it down there another year. I think it will do just fine!


Sunday, March 9, 2014

So close but so far!

I wish I would of taken more pictures of the progress on Saturday but I didn't take the time to. My Dad and Mom stopped by which was awesome. My Dad helped me get things installed on the engine and that helped a ton. Here is the engine all ready to come off the engine stand.
I pulled the engine off the engine stand and got it ready to install into the bug. I had to bend up a new metal fuel line because the old one was chaffing into the engine tin. I actually got lucky because it was really close to chaffing all the way through and that could of been really bad.
I am about to scoot the engine under the car and get it onto the jack so I can raise it into place.
If you remove the wheel, you don't have to jack the car as high. It's kind of interesting at this point because your lifting the engine while trying to get a floor jack under it. It really helps to have a buddy help at this point but it can be done by yourself if needed. I did this one by myself but I prefer to have help.
 Just as I got the engine on the jack and then raised where it needed to be Ellie brought me out a snack. Chips and milk in a sippy cup always hits the spot. (how do you like my plate for the chips?)  If she had come out a little bit earlier I would have had her push the jack under the engine when I lifted it. Ha Ha.
The engine is installed and most of the way hooked up. I decided to install a new fuel filter and run all new fuel line which of course ended up in a big puddle of fuel on the garage floor. It seems like every time I have to deal with fuel I get more on the floor then should be there. I must have a guardian angel watching over me because I should have been on fire a few times in my life.
I ended the night with the bug ready to be fired up but I didn't want to rush things. I want to make sure I break the rings in properly which requires the car to be driven from 30 to 50 miles per hour at least 10 times or more. I need to adjust the brakes and so I decided I should just adjust them while it's jacked up. When I get it off the jack stands I will then start it up and do the break in runs. I had a goal to get it running and driving by Saturday and I am so close but it didn't happen. Oh well, I will still have a week or so to make sure the engine is running good and not leaking before I go on my trip. I am keeping my fingers crossed that everything will work as it should. I will  not be able to work on it until at least Wednesday so check back then and see if it's on the ground and running.

Friday, March 7, 2014

Installing pistons and cylinders in an air cooled bug and then some!

I spent the day thrashing on the engine again. It is coming along nicely. Here are the updates. I pulled the fuel pump and the fuel pump base off to reseal it. I always had oil leaking from there so I figured now was the time to reseal it. VW uses paper gaskets on a lot of their parts and I'm not sure why. Anyways I use gasgacinch on all the paper gaskets. Here is the lower gasket before I installed the base of the fuel pump. I forgot to get a picture of the base of the pump but it is made of some kind of phenolic/plastic and it breaks really easy. Be careful when you remove it from your engine because they swell up and a lot of them will come out in a few pieces because of that. It's not the end of the world if it breaks, just make sure you remove all the pieces from your block. They are still available to buy. I got lucky and mine removed with a little persuasion.
 Here I have installed the base, the other gasket and the push rod. If you are changing the base make sure you measure your push rod to make sure it is the right length. It's easy to do. I didn't measure mine because I reused all the old parts and mine was fine before I tore it down.
 Before you install the fuel pump, put some grease in it. I like to do it like this. Now just install it with wavy washers and the nuts and torque it down. Be careful not to over torque it or you might break the base of it.
 OK now it was time for the pistons and cylinders. Here they are all layed out on a clean section of my toolbox. It is very necessary to make sure you clean everything before you install it whether it is used parts or new parts. I sprayed down all the parts with brake cleaner before doing anything. You can also use soapy water or you can even put them in the dishwasher. If you do this just make sure you wipe them down with oil so they wont rust. I think Dixie would kill me if she came home and saw the dishwasher full of car parts. Ha Ha.
My cylinders came with the rings not installed on the pistons. I like it better that way because you will need to remove the rings and check the gap anyways. I checked the gap on the rings and they all were good so I started by installing the oil scraper. The spring part goes on first followed by the top and bottom rings that sandwich the spring. This ring can be installed by hand without using a ring spreader.
 Examine your rings closely before you install them. You need to install them correctly. If there is a small dot like this or they say the word top you will need to install those rings with the markings towards the top of the piston. If there is no markings then you should be able to install the rings either way but make sure you look at the directions supplied with your rings.
 Don't dump all your rings out on your work bench without closely looking at the box. As you can see here the instructions are printed on the flaps of the box telling you which rings go where. It could be tragic if you install them wrong.
 I used a ring spreader to install the rings. It keeps them from twisting and makes installing them very easy. You can install them without these but be very careful not to twist them as you install them. You need to spread them out to install them over the piston. Do not try to spiral them into the groove. Bad things can happen if they get tweaked.
Once all the rings are installed onto the pistons you need to make sure you get the gaps aligned right. The 2 compression rings need to have the gaps of the rings 180 degrees from each other. The oil scraper needs to have the spring gap on the top of the piston. That means you need to figure out where the piston will be on the engine and which side the top of it will be. You then install the gaps of the top and bottom of the oil scraper and place them 1 inch on each side of where the spring comes together. Don't worry if your a little off on the gaps, it will be OK. Just make sure you don't line up all the gaps. That would be bad. Now just oil up the rings really good before you install the piston.
 I used a cheap ring compressor and it sucked. I like the ones that are like pliers but this is what I had to work with. It did the job but I had to mess with it for awhile to get it to work.
 Here it is in use as I installed the last piston into the cylinder. You line it up and just tap it in with a rubber mallet. Be careful if it binds, pull it out and figure out why so you don't break a ring.
 On a VW engine you have 2 choices on how to install the pistons. You can do it like I did by installing the pistons into the cylinders just enough to compress the rings but still have enough room to install the pin. The other option is to install the pistons onto the connecting rods and then use the ring compressor and install the cylinders onto pistons. I think it's easier to do it the way I did it. Another tip is to install the spring clip into the piston on the side that has little access. That way your not trying to install it with limited access. Make sure you oil everything really good before you install them.
Here are the cylinders and pistons installed onto the block. I ran a small bead of RTV on the cylinder base before I matched them up. That is enough to seal the cylinders up. Make sure you install the pistons correctly. The arrows need to point towards the flywheel. I found 1 piston installed wrong when I tore this engine apart. I had to work fast installing the heads before the rtv dried so that is all the pictures I took.
This is how I left it tonight. The heads are on and torqued and I started installing the tins and other accessories. I need to get the intake gaskets and some other things tomorrow to finish putting it together. I think it will come together quickly and hopefully it will be running tomorrow.
I will try to get it on video the first time it fires up. That is if I can figure out how to use my phone to record a video. Ha Ha.